
How to Patch Missing Shingles Before Calling A Roofer
- Enrique Navarro
- Oct 4, 2025
- 7 min read

Shingles are a crucial part of your roof's defense against the elements, and missing or damaged ones can lead to serious problems. In this guide, I will show you how to patch missing shingles effectively, helping you protect your home from leaks and further damage. By taking these steps, you can protect your roof from deterioration and potentially avoid costly repairs in the future. With a few simple tools and materials, you can restore your roof's integrity and maintain its value.
Key Takeaways:
Inspect the roof to identify the areas with missing shingles.
Gather the necessary tools: replacement shingles, roofing nails, a hammer, a utility knife, and a ladder.
Remove debris and nails from the area where shingles are missing.
Cut new shingles to size if needed, ensuring they match the existing shingles.
Install the new shingles, aligning them properly and securing them with nails.
Seal the edges with roofing adhesive for extra protection against leaks.
Check for any additional damage that may need professional attention.
Understanding Roof Shingle Types
Different types of roof shingles serve unique functions and offer distinct aesthetics for your home. Understanding the key characteristics of each type can help you make informed decisions when replacing or repairing missing shingles. Here's a breakdown of common shingle types:
Asphalt Shingles
Wood Shingles
Metal Shingles
Slate Shingles
Tile Shingles
Any choice of roofing material affects the durability and style of your home.
Asphalt Shingles
Asphalt shingles are the most popular roofing material, primarily due to their affordability and ease of installation. They come in a variety of colors and styles, allowing homeowners to choose options that fit their aesthetic preferences.
Wood Shingles
Wood shingles offer a distinctive, natural appearance that enhances your home's charm. Typically made from cedar or redwood, they provide excellent insulation and durability. However, they require regular maintenance to prevent rot and insect damage.
Wood shingles typically last 20 to 30 years when well-maintained. They can be treated or coated to enhance their resistance to weather conditions and pests. Installation may appear more labor-intensive compared to asphalt, but its distinctive appearance often compensates for the added effort.
Metal Shingles
Metal shingles are renowned for their exceptional longevity and resistance to harsh weather conditions. They can mimic the appearance of other materials while providing excellent durability and energy efficiency. Their lightweight nature makes installation straightforward.
Metal shingles can last 50 years or more with proper installation and care. They are fire-resistant and can lower cooling costs due to their reflective properties. While the upfront cost may be higher, the long-term benefits often outweigh initial expenses.

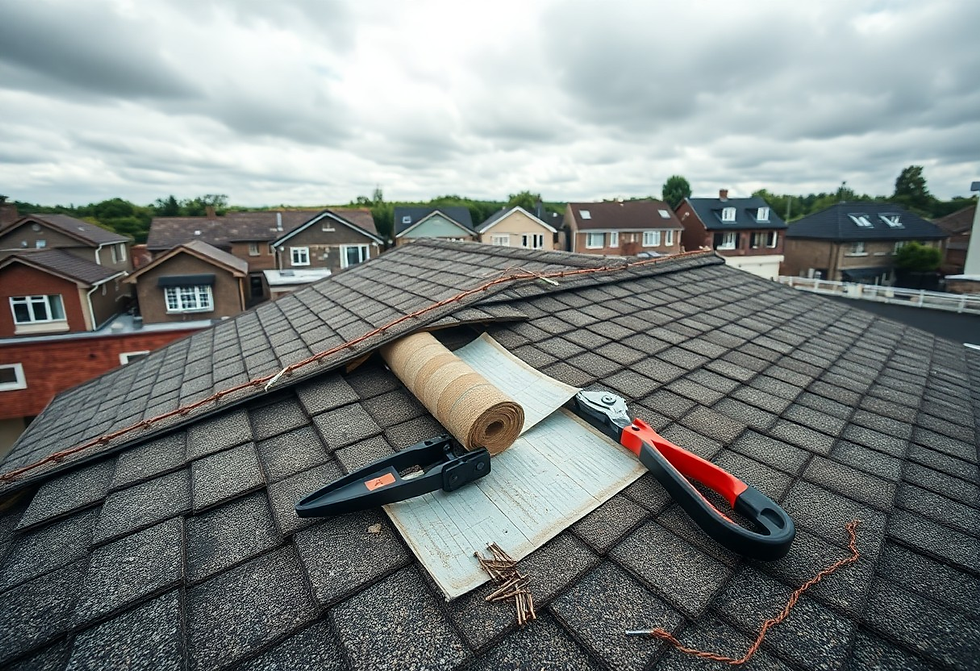
Tools and Materials Needed
Gathering the right tools and materials makes the patching process efficient and effective, ensuring repairs can be done safely and quickly. You'll need both basic tools and specialized materials to replace those missing shingles successfully.
Essential Tools
I recommend having a stable and tall enough ladder to reach your roof, along with a utility knife for cutting shingles. A hammer and roofing nails are imperative for securing the new shingles, while a pry bar helps to remove any remaining damaged shingles.
Required Materials
Replacement shingles that match your existing roof are necessary, along with roofing nails for fastening them in place. Additionally, you might want to have roofing adhesive on hand to ensure a firm seal against future leaks.
Choosing the right replacement shingles involves matching the color and style to your existing roof, ensuring a seamless look. For most roofing systems, shingles are available in a variety of materials, including asphalt, wood, and metal. Ensure that I choose a durable option that meets your roof's specific requirements. Having a few extra shingles can be helpful for potential future repairs, ensuring you are always prepared.
Safety Precautions
Before tackling the repair, ensure you prioritize safety to avoid accidents. If you're unsure about the risks involved, refer to resources like Missing Shingles on Roof: What to Do Next for guidance on safe practices.
Personal Safety Gear
Wearing the proper personal safety gear is non-negotiable. Equip yourself with a hard hat to protect against falling debris, safety goggles to shield your eyes, and a sturdy harness if you're working at height. Non-slip boots are also imperative to maintain grip on the roof's surface and prevent slips.
Worksite Safety
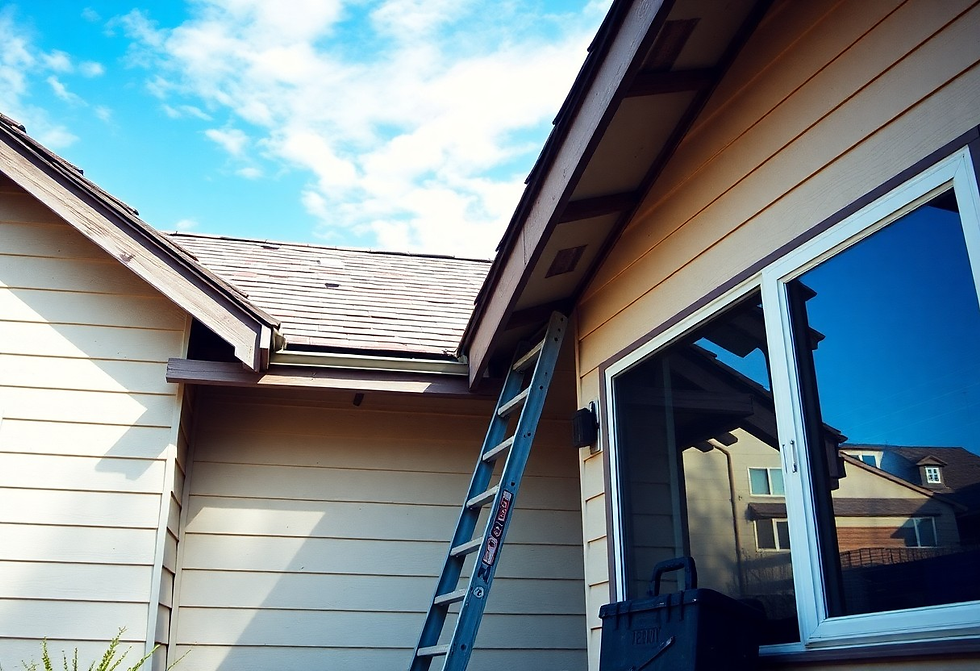
Ensuring worksite safety involves more than just personal gear. Clear the area of any debris and tools that could cause tripping. Use ladders with stable footing and ensure they extend at least three feet above the edge of the roof. Establish a clear path for carrying materials to minimize the risk of accidents.
On a steep roof, consider using a ladder stabilizer to enhance safety and stability. If possible, have a partner assist you; they can hold the ladder and provide help if an unexpected situation arises. Always double-check your grip and footing before making any movements. Assessing the weather conditions is also vital; avoid repairs during high winds or rain to prevent falls and other hazards. Taking these precautions can significantly reduce the risk of injury while working on your roof.

Identifying Missing Shingles
Identifying missing shingles involves a thorough examination of your roof's surface. Look for any noticeable gaps or areas where shingles are absent. Pay attention to weathered spots or areas that have experienced heavy rainfall or wind. Often, the damage may not be localized; multiple shingles could be missing in a single storm-affected area. Therefore, conduct a comprehensive survey across the entire roof.
Visual Inspection
A visual inspection requires you to carefully examine every section of the roof from the ground or a stable ladder. Use binoculars to spot distant damage, observing for curled, lifted, or completely missing shingles. Look for granule loss, which could indicate aging or degradation, and check the flashing around chimneys and vents for potential issues.
Evaluating Damage
Evaluating damage involves assessing not only the shingles themselves but also any underlying issues that may have resulted from their absence. Take note of any exposed underlayment or damage to decking, as moisture can lead to wood rot and leaks. Look for signs of water intrusion in your attic or ceilings, which may indicate that the missing shingles have allowed water to penetrate.
In my experience, evaluating damage involves examining the layers beneath the shingles as well. For instance, if you uncover wet or decayed wood, it can significantly escalate repair costs. Small leaks can quickly turn into significant problems, impacting insulation and structural integrity. Regularly evaluating your roof can help avoid larger, more expensive repairs down the line. Keeping track of roofing material age and weather conditions will assist in early detection of potential issues.
Steps to Patch Missing Shingles
Patching missing shingles requires a systematic approach to ensure a durable and practical repair. Start by gathering the necessary materials, including replacement shingles, roofing nails, a pry bar, and roofing adhesive. You'll follow a step-by-step process involving preparation, installation, and sealing to restore the roof's integrity and prevent further damage.
Preparing the Area
Before starting the repair, I clear the area around the missing shingles. Use a pry bar to remove any damaged or loose shingles from the surrounding space, ensuring the roof deck is exposed and clean of debris. Inspect this section for any underlying damage that may need attention as well.
Installation Process
To install the new shingles, align them with existing ones, and secure them with roofing nails. Ensure they fit snugly to maintain the roof's weather resistance. Start at the exposed edge of the roof and work your way up, overlapping edges to create a waterproof barrier.
Start by placing the new shingle over the exposed deck, aligning its edges with the existing shingles for a seamless appearance. Insert roofing nails at the suggested intervals, typically four or more for a single shingle, and secure them tightly. If the shingles are tongue-and-groove, ensure that they interlock properly for optimal seal. I also recommend applying a small bead of roofing adhesive under the overlapping sections to enhance waterproofing and stability.
Sealing and Finishing
After installation, I seal the edges of the new shingles with roofing adhesive to enhance weatherproofing. Pay special attention to ensure the seals are tight to prevent water infiltration. Allow sufficient curing time as specified by the adhesive manufacturer.
The sealing process involves applying a generous amount of roofing adhesive along the edges of the newly installed shingles. This extra layer protects against moisture and secures the shingles more firmly in place, which minimizes the risk of wind uplift. For added assurance, I often inspect the patches after a rainstorm to check for any leaks or loose areas, making adjustments as necessary to ensure long-term durability.
When to Call a Roofer
Signs of Extensive Damage
Suppose you notice multiple missing shingles or extensive granule loss; it's time to call a roofer. These signs indicate that your roof may be compromised and could lead to expensive leaks if left unaddressed. I often recommend seeking professional help if you notice water stains on your ceiling, as this may indicate a more severe underlying issue. Additionally, if your roof is over 20 years old and experiences significant damage, the risk of further problems increases, making a roofer's assessment crucial.
Conclusion
In summary, patching missing shingles is a manageable task that can extend the life of your roof before you need to call a professional. By gathering the right materials and following a step-by-step approach, you can effectively seal your roof against further damage. I recommend ensuring a proper match with existing shingles and securing them well to prevent future leaks. Taking these proactive steps helps protect your home and can save you from more extensive repairs down the line.
FAQ
Q: What are missing shingles and why do they matter?
A: Missing shingles are individual roofing pieces that have become dislodged or blown away. They can lead to leaks, water damage, and decreased roof lifespan. Addressing them promptly helps protect your home.
Q: How can I inspect my roof for missing shingles?
A: Safely access your roof using a sturdy ladder. Look for areas where shingles are missing or lifted. Also, check your gutters for granules that may indicate shingle wear.
Q: What materials do I need to patch missing shingles?
A: You will need replacement shingles that match your roof, roofing nails, a pry bar, roofing adhesive, and a utility knife. Safety gear is also recommended.
Q: How do I remove the damaged shingles?
A: Use a pry bar to lift the edges of the damaged shingle gently. Remove the nails with the pry bar and slide the shingle out. Take care not to damage adjacent shingles.
Q: How do I install new shingles in place of missing ones?
A: Slide the new shingle into place, secure it with nails along the designated slots, and apply roofing adhesive underneath the shingle edges. Ensure it aligns with existing shingles for a proper seal.
Q: Can I patch missing shingles in any weather condition?
A: It's best to patch missing shingles on dry days when temperatures are above 50°F. Wet or overly windy conditions can compromise the adhesion and safety of the repair.
Q: When should I call a professional roofer instead of patching myself?
A: If there are multiple missing shingles, significant damage, or if you feel uncomfortable performing the repairs, it is advisable to call a professional roofer for assessment and service.


Comments